In order to play with my toys I wanted to install a server on my home computer so I could have a test environment to play with said toys: koha, drupal (maybe), wordpress…
I searched online for some tutorials and I found a number (links to old tutorials) that had basic walkthroughs of installing Apache, PHP, CGI, MySQL, and phpMyAdmin. However, every time I tried following these tutorials something would cock-up. I would end up spending hours scrabbling around the internet to find solutions to get the damn things working.
So I have decided to write my own walkthrough for installing Apache, PHP, MySQL, and phpMyAdmin on an everyday PC for use at home as a test-bed, and this is that tutorial.
In the past I have run a home server from an old PC I had running Apache which was networked via a cross-over cable to my every-day PC. I would recommend this concept as more ideal than what I will be doing (installing and running a server from a subdirectory on my C:\ drive), as I have had a few problems with a slow down of my broadband connection when the server is running from a subdirectory on my everyday PC. However, as I only have access to my laptop for the time being, setting up the server as a subdirectory will be used as the example in this tutorial.
The most helpful tutorial I have found online recently to help me set up my server is this one at: http://www.ricocheting.com/server. This tutorial will be the basis for this walkthrough, and I’ll point out any problems I have on the way and the work-arounds I use. I’ll also let you know if I skipped any steps.
Before I begin, I’ll just list the versions of the software I ended up downloading (something I’ve learnt is that installation varies from version to version!!):
- Apache: version 2.0.59 – filename: apache_2.0.59-win32-x86-no_ssl
- PHP: version 5.2.0 – filename: php-5.2.0-Win32
- MySQL: version 5.0.27 – filename: mysql-essential-5.0.27-win32
- phpMyAdmin: version 2.9.1.1 – filename: phpMyAdmin-2.9.1.1-english
Here also is the folder structure I’m going to use for these installations and running the server. You might want to do it differently, but if you do, don’t forget to make sure all your paths are correct if you are editing any of the .config or .ini files!
- Apache installation: C:\webserver\Apache2
- PHP installation: C:\webserver\php
- MySQL: C:\webserver\mysql
- phpMyAdmin: C:\webserver\Apache2\htdocs\pma
You will also need a simple text editor for making edits to .config and .ini files. You could use Windows Notepad, but I prefer something a bit more sophisticated and useful which will for example, will show you line numbers (handy). I recommend textpad.
1. Installing Apache
(1.1) Download & Unpack
Download and install Apache from http://httpd.apache.org/download.cgi. Look for the “Win32 Binary (MSI Installer)” version. (you might want to change the download mirror first to get better speeds).
NOTE: Apache 2.2 will NOT work with any current stable version of PHP (you have to use beta 5.2). So make sure you download Apache 2.0.x
Following the instructions, the first hurdle I came to was deciding which version of Apache to install, the tutorial advises running a 2.0.x release of Apache but I knew I had been running Apache version 2.2.3 with PHP 4.4.4. previously.
I opted to go with being able to run a current version of PHP, so downloaded a 2.0.59 version of Apache. The Apache download page wasn’t very intuitive – I scrolled down the page until I saw a 2.0.x version mentioned, and downloaded the Windows installer file apache_2.0.59-win32-x86-no_ssl similar to that which the tutorial mentioned.
The installation of Apache was very straight-forward. I followed steps 1-4 as per the tutorial, and entered the settings as advised:
It’s worth taking note of these path notes BEFORE you start the install, the tutorial puts them at the end of their instructions.
(1.2) Path Notes:
if you are in Setup Type: Typical and you tell it to install to:
e:/apache/
what it’ll actually install to is:
e:/apache/Apache2/
In Setup Type: Custom you can specifically tell it where to install each of it’s parts/sub-parts.Also, if you are updating from a previous version of 2.x, you will have to uninstall the old version before installing the new one. However, apache 2.x will play very nicely with an older apache 1.x version.
Now on with the install…
(1.3) Install
When you install Apache, you’ll get a prompt for “Server Information.” Here is the settings I used:
Network Domain: localhost
Server Name: localhost
Admin Email: (your any email)Recommend checking: “for All Users, on Port 80, as a Service” (see Service -vs- Manual below)
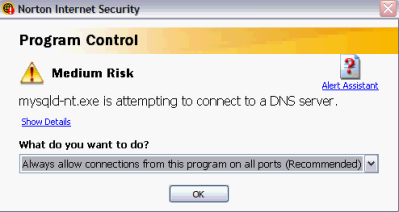
At this point if you have Windows XP with SP2, you’ll get a “Windows Security Alert” about blocking incoming connections for Apache. Choose “Unblock” on the window that comes up.
I didn’t get the Windows security alert that the tutorial mentioned, as I’ve installed Apache in the past. I came across it the first time I tried installing Apache and just selected “allow all connections” and clicked ok (NB. my security alert is generated by my Norton Antivirus software which I use for my firewall). It will look something like this:
(1.4) Starting/Stopping Apache
After installing, Apache2 automatically starts. The
icon in the System Tray means it started. The
icon means the “Monitor Apache Servers” is running, but Apache2 isn’t started.
You can easily start/stop/restart Apache and Apache2 via that icon in your System Tray. If you get “The requested operation has failed!” error while starting apache use the “Test Configuration” shortcut in the Start Menu to find the error (if the text window pops up then closes before you can read it, your config file is fine).
If you can see these icons in your taskbar, congratulations! You’re 85% on your way to running Apache.
(1.5) Testing
Now the ultimate test. To see if it’s serving. Open your browser and head to: http://127.0.0.1/ or http://localhost/
If it shows the Test Page for Apache Installation you have your server software installed and running.
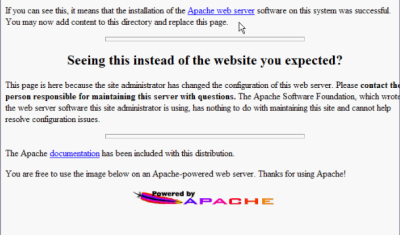
If that test worked (see image above), CONGRATULATIONS you are now running a successful Apache install!
I didn’t bother with step 5. Making Apache point to your files as I was happy for my web files to be stored in the Apache htdocs folder (C:\webserver\Apache2\htdocs\).
(1.6) Making Apache Point to Your Files
Using [your text editor] open E:\Apache2\conf\httpd.conf (in the start-menu there should also be a “Edit the Apache HTTP Server httpd.conf Configuration File” shortcut) and search for DocumentRoot. Change it from something like DocumentRoot “E:/Apache2” to the location where your HTML files and site are located. In my case: DocumentRoot “E:/public_html”
Then scroll down about one page and change: <Directory “E:/Apache2/htdocs”> to point to the same location you set DocumentRoot to in the last step. Restart apache to make the changes take effect
NOTE: The first time i installed Apache2, i accidentally changed ServerRoot. Make sure you change the correct line which is DocumentRoot and which is down about line 225.
2. Installing PHP
Choosing which PHP version to install was a little bit more straight forward.
Only, unlike the recommendation in the tutorial I accidently downloaded and installed the windows installer file (php-5.2.0-win32-installer) rather than the .zip file (php-5.2.0-Win32). Don’t do this, as it leads to problems later – make sure you download the .zip file!
Once I had the correct install file (php-5.2.0-Win32) the installation of PHP itself was easy.
I followed steps 1-4 of the tutorial as instructed:
(One thing I would point out is that when installing PHP into your directory (if you want it in it own subdirectory as I did), make sure you specify a PHP folder at installation (e.g. C:\webserver\php and NOT C:\webserver) as it doesn’t create a folder for itself during the installation process as Apache does).
(2.1) Download & Unpack
Download and install PHP from http://www.php.net/downloads.php, you should grab the newest 5.x.x Windows Binary zip package that will work on apache.
Unzip php. In my case, I unzipped to:
e:\php\
Rename e:\php\php.ini-dist it to php.ini
(2.2) Edit your php.ini
Open php.ini in a text editor and scroll down about halfway through the file and look for doc_root then change it to point to whatever your Apache DocumentRoot is set to. In my case: doc_root = “e:\public_html”
Scroll down about 7 more lines and change the extension_dir from extension_dir = “./” to the location of the ext directory after you unzipped PHP. in my case: extension_dir = “e:\php\ext”
I skipped this step:
Another thing you might want to change is you session path. Search for: session.save_path and uncomment (remove the ; mark) and change it to an existing directory. One reader pointed out the Window’s temporary directory works well. So session.save_path = “c:/windows/temp” or if you use Win2k maybe session.save_path = “c:/WINNT/Temp”
And also skipped this step:
If you are going to be using your server for testing, i recommend (this is optional) you search and change the error reporting to give you info on any errors, notices, or bad coding. If you want to enable this type of stuff, look for and change:
error_reporting = E_ALL & ~E_NOTICE & ~E_STRICT to error_reporting = E_ALL | E_NOTICE | E_STRICT
Then followed this step:
(2.3) Editing Apache Conf File
Using [your text editor] open e:\Apache2\conf\httpd.conf (in the start-menu there should also be a “Edit the Apache HTTP Server httpd.conf Configuration File” shortcut). Either at the very beginning or end of the file add the following lines: (NOTE: be sure to change BOTH e:/php parts to the directory you installed your php to):
LoadModule php5_module “e:/php/php5apache2.dll”
AddType application/x-httpd-php .php
PHPIniDir “e:/php”(2.4) Testing
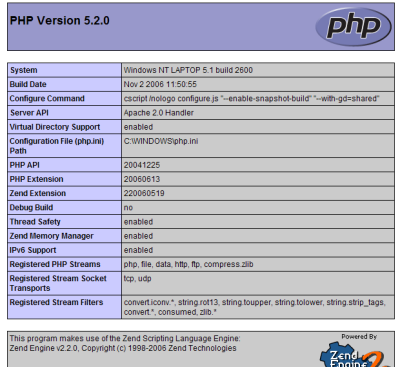
Restart Apache if it is already running (if it doesn’t start or you get errors, use your Apache “Test Configuration” shortcut in the Start Menu to see why).To test your PHP simply create a test.php file in your Apache “DocumentRoot” folder (E:\public_html\ in my case). In your test.php file, type these 3 lines and then load the file in your browser like http://localhost/test.php (you should get a whole long list of php variables, settings, etc):
<?php
phpinfo();
?>
You should see the following image – if so, congratulations! You have PHP running on your server!
3. Installing MySQL
MySQL is always the application I have problems with… and this occasion was no different!
(3.1)Download MySQL
Download MySQL from http://dev.mysql.com/downloads/ Just make sure you get a Windows Essentials (x86) binary version. (after you click “pick a mirror,” skip all the questions part and scroll down to the mirrors list)
(3.2) Install MySQL
Run the MSI file and use the following settings
- Typical Setup
- Skip Sign-Up
- make sure “Configure the MySQL Server now” is checked
- “Detailed Configuration”
- “Developer Machine”
- “Multifunctional Database”
- “InnoDB Tablespace Settings” – leave everything default
- “Decision Support (DSS)/OLAP”
- make sure “Enable TCP/IP Networking” is checked and leave the port number at 3306 (at this point, if you have a firewall, it will usually try to access itself on the localhost)
- “Standard Character Set”
- check “Install As Windows Service”
- enter your root password and I would recommend leaving “Enable root access from remote machines” unchecked
- then hit “execute” and it’ll install and set it up.
Download and installation following steps 1-2 in the tutorial goes well until I get to this screen, where I got the following error: Cannot create windows service for MySQL error:0:

From what I can gather, the cause of this problem is that MySQL can’t start a service because a service is already running from a previous installation. The way to fix this problem is simple…
Go to your start menu and load the command prompt: Start > All Programs > Accessories > Command Prompt
Browse to your C:\ drive and kill the existing instance of MySQL by typing:
cd c:\ sc delete mysql
Hopefully if this is your first install you won’t encounter this problem.
I then did as instructed in step 3:
(3.3) Getting PHP5 to work with MySQL
Unfortunately PHP5 removed built-in support for MySQL. So you’ll need to copy some files by hand. Open the folder you unzipped your PHP to. Copy the libmysql.dll file (should be located like E:\php\libmysql.dll ) into your Window’s System folder (usually C:\Windows\System32\ although might be C:\WinNT\System\ or something).
Then open up your php.ini in a text editor and search for ;extension=php_mysql.dll and remove the ; infont of that line.
Restart Apache and see if you get any errors. If it complains about “php_mysql.dll” either your extension directory isn’t correct or windows can’t find libmysql.dll
But found that the test given in step 4. didn’t work – instead I’ll go ahead and install phpMyAdmin, and if that works, we know MySQL is working!
4. Installing phpMyAdmin
The tutorial I have been using thus far does not include a section on installing and running phpMyAdmin, so I have puzzled the following section together myself.
phpMyAdmin is an interface that lets you create and manage your MySQL databases visually rather than by command. I guess it is recommended for MySQL beginners, I certainly find it easier to use (admittedly, I haven’t used it often!).
(4.1) Download
Extract you zip file into your apache/htdoc folder – phpmyadmin has to be run from the server.
(4.2) Install
In my case I renamed the phpmyadmin folder since it was rather long after it was unzipped to pma. So the path to my phpmyadmin installation is C:\webserver\Apache2\htdocs\pma.
(4.3) Create a Configuration File
Go into your pma folder and rename the config.sample.inc.php file to config.inc.php.
Now open this file in your text editor, and delete its contents. Now copy the code below, and past it into the config.inc.php file and save.
<?php$i=0;
$i++;
$cfg[‘PmaAbsoluteUri’] = ‘http://localhost/pma/’; // if you didn’t use the same directory make sure this path is the way you have your folders configured
$cfg[‘Servers’][$i][‘user’] = ‘root’;
$cfg[‘Servers’][$i][‘password’] = ‘*******’; // type your password here?>
(4.4) Test & Run
Restart Apache server and then point your browser to: http://localhost/pma/index.php and you should see the following

Phewf, and that should be it.


 Posted by alt-tabbing librarian